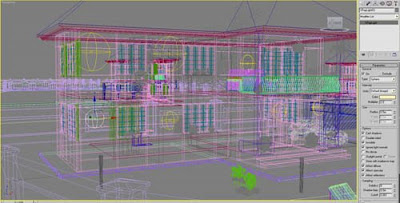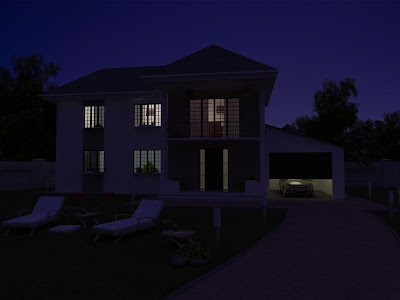
OK langsung aja, untuk postingan kali ini, tak informasikan kepada anda semua bagaimana cara merender eksterior rumah pada saat suasana malam hari dengan vray, hasilnya seperti gambar diatas. Perlu diketahui juga bahwa tutorial ini di-peruntuk-kan bagi anda-anda kabeh yang sudah menguasai program 3Ds Max, karena penjelasan dalam tutorial ini di persingkat ben ora capek ngetiknya dan banyak makan tempat, jadi jangan salahkan daku jikalau dirimu radonk, he3x, selamat mengikuti tutorial berikut ini…
In this tutorial I will go through all the steps that we usually do when I’m asked to do an “exterior night-rendering”. In order to follow it you need to know the basics of 3ds max and vray
1) Natural light The first step is to choose a background image of a sky. For this tutorial I have used the image bellow

Now put the desired image into the environment slot (3d max’s environment slot, not in vray’s). In the vray settings, check global illumination, select lightcache for secondary bounces, irradiance map for primary (you could also use brute force, but it will take longer to render). In the global switches tab, make sure that “default lights” is unchecked.
Last but not least go to the vray environment slot and check “GI environment (skylight) override. In the slot right beside put a gradient (dark blue in the upper slot, a lighter blue in the middle and a pale orange or purple in the lower position)


2) Adding artificial lights inside As you notice, it is starting too look like a night rendering, but at the moment it lacks artificial lighting so the spaces look deserted.
We will begin by adding vray lights inside the house, to simulate artificial lighting. The important thing to keep in mind at this point is that artificial light can look different from one case to another depending on many factors (intensity, color temperature, size of the space that is actually lit, etc.) so you shouldn’t put a light source and instance it all over the place. Be creative and play with parameters like intensity multipliers, filter colors, etc. For this scene I have used spherical vray lights with intensity multipliers varying from 1 to 2, filter colors with orange, yellow and blue tints and different a radius for each one

If you hit another render you will end up with something very similar to the following.

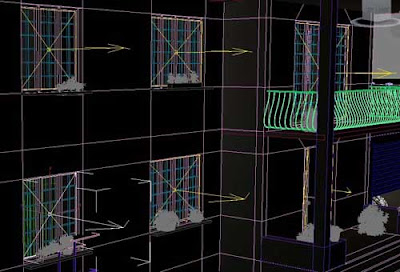
3) Simulating artificial light “spreading” from inside Now we have light inside the house, but the light doesn’t seem to “come out” enough. Therefore we will place vray planar lights just in front of the windows, pointing towards the exterior, like in the following image

Hit another test rendering and you should have something similar to the render bellow:

4) Adding artificial lights in the courtyard We are getting closer. What doesn’t look right at the moment is the fact that the courtyard is too dark. Depending on your scene, you may have exterior lighting fixtures (like the lighting posts that I have in this scene), or even exterior spotlights that illuminate the building. If you don’t have specific instructions for these, you could place lights somewhere behind the camera, so that you give the impression that the space is receiving illumination from neighboring sources (street lights, car lights, or even other buildings).
In this particular scene, adding lights to the lighting small garden lighting posts should be enough. First I have assigned them a vraylight material with a gradient map; than I have placed vray spherical lights over each one. For each vray light in the courtyard I have excluded the lighting post bellow it. This is kind of a fake, but in the end it looks right, and that’s all that matters. (If you want to do it more “accurate” check out the lampshade tutorial as well).

Hitting a test render at this stage you should obtain something like this:

5) Photoshop touches a) Add a subtle glow effect to the visible artificial light sources (in this case, the small lighting posts). You can do this using the diffuse glow filter. b) In a new layer, add a linear gradient from bottom to somewhere at the middle from orange to transparent. Put the layer on “color” and play with the transparency until you like the result. If you are feeling creative, you can also try some subtle brush strokes, with different tints of red, yellow or orange to create diversity. After having done all of the above, here is the final image
(CLICK THE IMAGE TO VIEW A HIGH RESOLUTION RENDERING)

Tidak ada komentar:
Posting Komentar